
Choosing the Right Fabric for Your Tree Skirt
How to make a tree skirt? Choosing the right fabric is vital when learning how to make a tree skirt. The fabric you select will determine both the appearance and longevity of your tree skirt, making this step fundamental to the project’s success. Aim for a harmonious blend of durability and style to ensure your skirt stands the test of time without sacrificing its festive appeal.
Considering Durability and Style
Durability is essential, especially since the tree skirt will likely see a lot of use during the holiday season. Fabrics that resist wear and tear will keep your skirt looking fresh year after year. Consider materials that are easy to clean and can handle accidental spills, like a dropped glass of eggnog. Style, on the other hand, pertains to the fabric’s look and feel. This is where you can express your personal aesthetic and holiday spirit. Shoot for colors and patterns that match your existing holiday decor or go for a completely new theme that stands out. Ensure that the fabric reflects the joy and beauty of the season.
Exploring Different Fabric Types
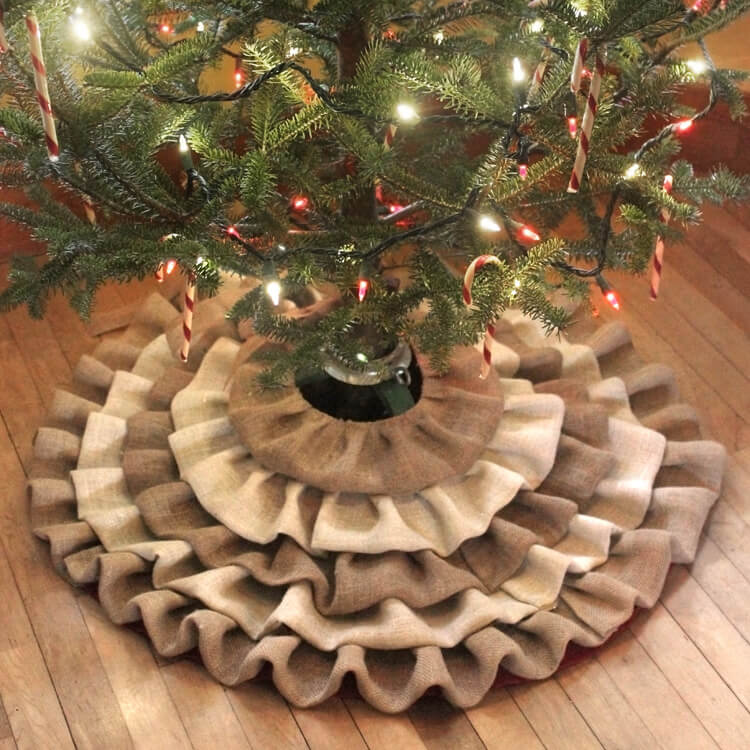
There are several fabric types suitable for a tree skirt. Cotton is a popular choice due to its versatility and ease of handling. It comes in a myriad of prints and colors, suitable for custom designs. If you desire a more luxurious touch, consider velvets or satins, which offer a rich texture and elegant sheen. For a rustic look, burlap or a quilted fabric might be the way to go. It’s also wise to think about fabric weight. Heavier materials may lie better around the base of the tree, while lighter fabrics could offer a more delicate, flowy appearance. Each type of fabric brings a different quality to the table, so weigh your options carefully to find the perfect match for your tree skirt.
Planning Your Tree Skirt Design
After choosing the right fabric, planning your tree skirt design is the next crucial step. This phase lays the groundwork for your project, ensuring that the final product complements your holiday decor and fits your Christmas tree perfectly.

Deciding on the Size
When learning how to make a tree skirt, size is key. You’ll need to measure the base of your Christmas tree. Start from the outermost branch and measure to the trunk. This ensures your skirt covers the stand and reaches out far enough to look proportionate. Don’t forget to consider the clearance from other furniture or walls. A general rule is to add a few inches to the diameter for a comfortable fit.
Selecting a Pattern or Theme
Your tree skirt’s pattern or theme should resonate with the festive spirit. Think about whether you want a classic design, like red and green plaids, or something more unique, such as a winter wonderland scene. The theme might be inspired by your favorite holiday motifs, like snowflakes, reindeer, or sleigh bells. Remember to ensure your chosen pattern or theme complements your holiday decor and the fabric’s style and feel you selected earlier.
Gathering Your Sewing Materials
Before diving into the making of your tree skirt, gather all necessary sewing materials. Preparation is key to a smooth sewing experience and a successful end result. Ensure you have all your tools within reach to avoid interruptions once you commence your sewing project. Let’s break down the essentials and the optional decorative elements you might want to include.
Essential Sewing Tools
Every sewing project requires basic tools, and making a tree skirt is no exception. Start by collecting sharp scissors for cutting fabric – they must be strong enough to handle your chosen material. You’ll need a measuring tape for precise measurements and a seam ripper just in case any mistakes need correcting. Pins will hold your fabric pieces together before sewing, and a pincushion will keep them organized. Don’t forget a sewing machine or needle and thread for putting it all together. These are indispensable when learning how to make a tree skirt. Your toolkit should also include chalk or a fabric marker for drawing guidelines on your fabric.
Additional Decorative Elements
Once you have your basic tools, consider the extra touches that will elevate your tree skirt. Look for ribbons, lace, or sequins if you’re aiming for a bit of sparkle and glamour. If you prefer a traditional look, plaid bows or jingle bells could be charming additions. Fabric paint or iron-on patches allow for more creativity and uniqueness. Reflect on the theme you’ve chosen to ensure your decorations align with the overall design. Remember, these add-ons should enhance but not overshadow the beauty of your tree skirt.
Cutting the Fabric
Before sewing your tree skirt, precise cutting is important. Good cutting leads to a better fit and a professional look. Make sure to have ample space to lay out your fabric.
Preparing the Fabric
Start by washing and ironing your fabric. This removes any wrinkles or shrinkage. Set it flat on a large table or floor. Smooth out any folds or creases to ensure accuracy while cutting.
Marking and Cutting Techniques
Use a fabric marker or tailor’s chalk to mark your pattern onto the fabric. Always measure twice before cutting. Use sharp scissors or a rotary cutter for straight, clean cuts. Follow pattern guidelines carefully. Cutting right the first time saves fabric and time.
Sewing the Pieces Together
Once you’ve cut your fabric, it’s time to sew the pieces together. This is where your tree skirt begins to take shape. Follow the step-by-step instructions carefully to create a beautiful and sturdy tree skirt.
Step-by-Step Sewing Instructions
- Lay out the fabric pieces on a flat surface.
- Align the edges, with right sides facing each other.
- Pin the pieces together to hold them in place.
- Sew along the edge with a sewing machine, leaving a seam allowance.
- Remove the pins as you go along.
- If the design calls for it, sew any additional layers or ruffles.
- Turn the skirt right side out through an opening left for this purpose.
- Iron the seams flat for a polished look.
Remember, patience is crucial. If you rush, you may make errors. Take breaks if needed.
Tips for a Clean Finish
A well-made tree skirt has clean lines and neat edges. Here’s how you achieve a professional-looking finish:
- Use a blind hem stitch for invisible seams.
- Trim excess threads after sewing.
- Iron each seam as you complete it.
- Topstitch where necessary for added durability.
- If you’re adding a lining, attach it carefully to avoid bunching.
With these steps and tips, learning how to make a tree skirt is within reach. Take your time during each step to ensure a beautiful outcome.
Adding Decorative Touches
Once you’ve assembled your tree skirt, adding decorative touches can make it truly one-of-a-kind. This is your opportunity to inject personality and charm into your creation. Use creativity and choose decorations that reflect your holiday style. A well-decorated skirt can become a cherished part of your Christmas tradition.
Ideas for Personalization
Personalizing your tree skirt adds sentimental value and can tell a story about your family or holiday traditions. Consider these ideas:
- Embroider your family name or a special date onto the fabric.
- Create appliques from leftover fabric to design unique shapes like stars or Christmas trees.
- Add photo pockets to display family pictures from past Christmases.
- Integrate your favorite holiday quotes or song lyrics through fabric paint or iron-on letters.
Choosing personal elements shows off what makes your holiday season special. It also gives your tree skirt a heartfelt touch that store-bought ones lack.
Applying Embellishments and Trimmings
Enhance your tree skirt with the right embellishments and trimmings. Here are some options:
- Sew on beads, sequins, or crystals for sparkle.
- Attach ribbons or lace around the edges for elegance.
- Use colorful buttons or pom-poms for a playful look.
- Include bells or tassels that jingle when touched for a festive sound.
When applying decorations, make sure they are secure. You want them to last for many holiday seasons. Keep in mind that less can be more. Don’t overload the skirt with trimmings. Aim for a balanced and tasteful appearance.
Attaching Ties or Closures
After sewing your tree skirt, you need to choose how to secure it. Ties or closures keep the skirt wrapped neatly around your tree. They also make it easy to remove for cleaning.
Choosing the Right Closure
Select a closure that is easy to use and matches your tree skirt’s style. Velcro is a popular option because it’s simple and discreet. Snap fasteners are another choice that can give a clean look. Ties made from ribbon or fabric strips offer a traditional touch.
Consider the overall design of your skirt when making your choice. A closure should complement, not distract from, your tree skirt’s appearance. Remember that practicality matters too. Pick a closure that won’t come undone easily.
Sewing Ties for Your Tree Skirt
If you choose to add ties, you will need to sew them securely. Cut strips of fabric or ribbon to the desired length. Aim for a length that is easy to tie but not too long. Attach the ties to the edge of the open part of your skirt. Ensure they are evenly spaced.
Sew the ties on by hand or use a sewing machine for a stronger hold. Stitches should be small and tight to prevent the ties from coming off. If you’re using ribbon, burn the ends slightly to stop fraying.
Sewing ties or closures is the final step in making sure your tree skirt is functional. Take care to do this part well for a tree skirt that lasts for many Christmases.
Final Touches and Care Tips
After completing your tree skirt, final touches are important for a long-lasting finish. Care tips ensure your skirt remains in prime condition year after year.
Inspecting Your Work
Take a moment to examine your tree skirt carefully. Look for loose threads or uneven seams and fix them. Check that all decorative elements are firmly attached. Ensure that ties or closures work properly. A thorough inspection helps avoid future repair needs.
How to Wash and Store Your Tree Skirt
To wash your tree skirt, follow the care instructions for your fabric. If it’s machine washable, use a gentle cycle with cold water. Hand wash if needed to preserve details like beads or appliques. Dry it flat or hang it to prevent creases. Before storing, fold it gently or use a garment bag to protect from dust. Store in a cool, dry place until the next holiday season. Proper care extends the life of your tree skirt, making it a lasting part of your Christmas tradition.